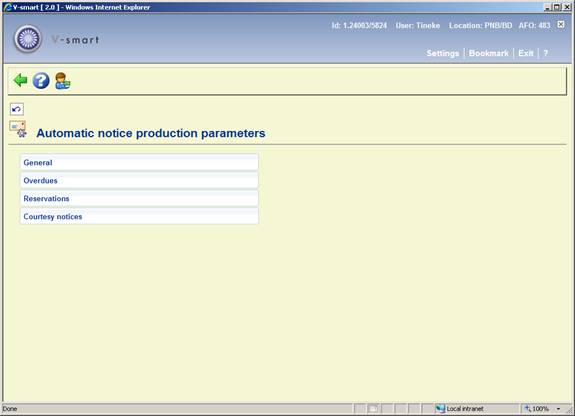
After selecting this menu option, a sub menu is displayed:
The menu options are described in the next sections.
See the general help on automatic notice production for more information.
These general parameter settings cover the “shared” settings used by the automatic notice production feature. After selecting this menu option, an input form will be displayed:
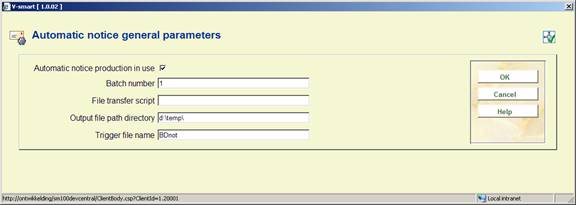
Automatic notice production in use: This parameter is used to either turn on or off the entire automated notice production process. Note that each defined notice run may also be activated and deactivated individually should this be needed.
Batch number: This batch number will be used as part of the file name. This number will be automatically incremented following each run. If batch numbering is not required simply leave this field “blank”.
File transfer script: The field contains the location and name of the transfer script used to transfer the notice files to their final destination. Leave this field “blank” if the notice files are to remain at their current location. (See “Output file path directory” parameter below).
Output file path directory: This shows the directory path where ALL notice files created automatically will be stored.
Trigger file name: This is the name of the trigger file to be created as part of the transfer process if required. This file will be created as a zero length file in the same output directory as the notice files. It will then be transferred to the same destination as the notice files if a transfer script is being used, to indicate that all the created files have successfully transferred. Note that the date and/or the batch sequence number may be entered as part of the file name using the same formatting rules as that used by the file name and extension fields.
In this section the rules for automatic production of overdue notices can be defined. After selecting this option a summary screen is displayed:
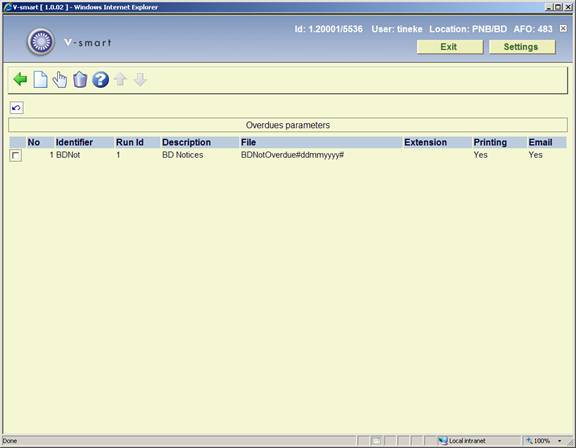
Each rule is identified by the first 2 column values and the pair of values are combined to form a unique “key” to the stored parameter values for each rule. There can be as many rules defined are required and these my each be marked as “in use “ or “not in use” for each notice output type (printing or email).
: Select a line and then this option to modify the parameters of the selected rule.
:Select a line and then this option to delete the selected rule.
: Choose this option to create a new rule. An input form will be displayed:

The form is presented in two sections.
The first section is used to define the identifier, run number and output file naming to be used for this rule and also the current status of the rule. The second section is used to select the notices for each run.
Identifier & Run number: Used to identify the rule on the AFO 451/452 summary screen, shown in the contact method field. Note that the pair of values will be combined to form a unique key.
Description: A free format text field used to describe the notice rule set.
File name: File name to be used when creating the output notices for the rule. Note that if the date, time or batch sequence number will be included in the file name, they should be included as part of the name inserted in the appropriate point by using the following format:
· Date “#ddmmyyyy#”
- Where yyyy = year; mm=month; dd=day
· Time “[hhmmss]” or “[hhmm]”
- Where hh=hours; mm=minutes; ss=seconds
· Batch sequence “{nnn}”
- Where the nnn characters entered will be used to determine the batch number length. The batch number will be padded to this length with leading zeroes.
File name extension: A free format text field used to define the file name extension should one be required. Note that the date and/or the batch sequence number may be entered in this field in the same format as that used by the file name field above.
Automatic printing: An “in use” status indicator used to activate the rule for automatic printing.
Automatic email: An “in use” status indicator used to activate the rule for automatic emailing.
The second section of the parameters have the same meaning as if entered via the manually run overdue notices output screen accessed via AFO 452 and is not explained in this document.
In this section the rules for automatic production of overdue notices can be defined. After selecting this option a summary screen is displayed:
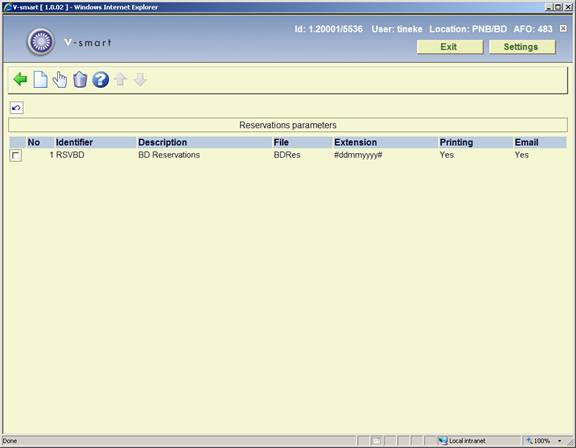
See above for an explanation of the various options, which are similar to those for overdue notices.
In this section the rules for automatic production of courtesy notices can be defined. After selecting this option a summary screen is displayed:

See above for an explanation of the various options, which are similar to those for overdue notices.
This option allows you to print the address of the issuing location of the item on overdue notices, or the address of the pickup location on reservation notices.
After choosing this option a selection form is displayed:

If $$ADRES is defined in the relevant notice layout, and this option is turned on, then the system will use the address of the lending location or the pickup location for overdues and reservation notices respectively.
This option is only available for notices output using the "SSP format" setting.
If, during any one run, for example, there are reservations notices for the same borrower, for items to be collected from two different locations, then the system will generate two printed notices – one headed for the first location, the other for the second location.
The collation sequence of the notices is not changed – which is by borrower category for SSP notices, so the two pages will be printed sequentially.
This option is used only at the moment when the notices are printed, so it may be changed with immediate effect at any time. The setting applies to all notices for a circulation system (meta-institution).
Finally, it is possible to turn these options "on" even though $$ADRES is not used in the notice output formats; in this case, the notices will continue to be split into separate pages, according to the location, but there will be no other impact on the notice layout.
After choosing this option an overview screen will be displayed with the relevant codes:

For each of the four options you can define the following:

Card measurements: In this field, enter the three parameters that pertain to the dimensions of the card, separated by a “:” (colon):
the length of the card, expressed in the number of lines;
the margin at the top (the number of blank lines);
the margin at the bottom (the number of blank lines).
Example
“18:2:2”
Meaning:
The card is eighteen lines long and both the top and bottom margins consist of two blank lines.
Position of columns: In this field, enter the two parameters that pertain to the positions of the columns on the card, separated by a “:” (colon). Per parameter, the start position and the maximum width of the relevant column should be entered, separated by a “~” (tilde).
Example
“3~35:45~23”
Meaning
The column on the left is printed starting in position three and has a maximum width of 35 characters. The column on the right is printed starting in position 45 and has a maximum width of 23 characters.
Delimiter position: In this field, enter the two parameters that pertain to the delimiter, separated by a “:” (colon).
Enter the position at which the delimiter between the column on the left (which contains the information on the item level) and the column on the right (which contains the borrower information) is to be printed, and the punctuation mark to be used as the delimiter.
Please note!
The punctuation marks space, tilde (“~”), up arrow (“”) and underscore (“_”) may not be used. If you do not want to use a delimiter, e.g. because the card has a pre-printed delimiter, leave this field empty.
Example
“41:|”
Meaning
“|” (the pipe symbol) is used as delimiter. The pipe symbol is to be printed at position 41.
Data to be printed: In this field, enter one or more code for the information to be printed on the card. Separate the codes using a “:” (colon). Per code, indicate what is to be printed (as indicated in the table below), then a “~” (tilde) and the maximum length for that type of information.
|
No. |
Meaning |
|
1 |
Title |
|
2 |
Author |
|
3 |
Volume |
|
4 |
Due date |
|
5 |
Overdue number |
|
6 |
Item number |
|
7 |
Call number |
|
8 |
Title + due date (on one line) |
Example
“2~1:1~1:6~1”
Meaning
The system will print in the following order:
the author (2), maximum length one line;
the title (1), maximum length one line;
the item number (6), maximum length one line.
Max. no. of items per card: Enter the maximum number of items to be included on a single card. The number entered must be greater than “0”. This can be used to indicate, for example, that a separate card is to be used for each item for which a reservation has been submitted. In that case, you should enter “1” in this field.
Leading sign: In this field, enter the character to be printed as leading sign. This character is printed on the card preceding each item.
Please note!
The punctuation marks space, tilde (“~”), up arrow (“”) and underscore (“_”) may not be used.
Example
A overdue card with three items with no introductory character:
The Duck Symphony in DoReMi
Boston Philharmonic
A34124000000055B
Pretty Woman
Orbison, Roy
A34124000009355B
Suddenly
Ocean, Billy
A34124000012345B
A overdue card with three items, with the introductory character “*” (star):
* The Duck Symphony in DoReMi
Boston Philharmonic
A34124000000055B
* Pretty Woman
Orbison, Roy
A34124000009355B
* Suddenly
Ocean, Billy
A34124000012345B
After choosing this option an overview screen will be displayed with the relevant codes:

For each of these options you can define the following:

Indicate in this field the level on which the texts are to be defined. The system distinguishes between three levels:
· general: the texts apply to the entire system; in other words: for all locations of all institutions
· per institution: the texts apply to all locations of the institution for which your workstation is logged in
·
per institution/location: the texts apply only to the institution/location for which your workstation is logged in.
Please note!
Texts can be defined on multiple levels. When printing the texts, the system will select the most specific text available.
When you have selected the text level, an input screen will be displayed:

Indicate in this field that text you want to enter. When you select this option, an input screen will be displayed. Enter the text in this field.
Print function ‘Accept giros', ‘Accept giros(overdue 1)' and ‘Accept giros(overdue 2)'
When you have selected the text level, an input screen will be displayed:
Indicate in this field that text you want to enter. When you select this option, an input screen will be displayed. Enter the text in this field.
Note
When entering a text, be sure to take the available space into account.
The following codes can be used in texts. These codes are translated when the text is printed.
|
$BIB$ |
is translated as a description of the library sending the printout. |
|
$CON |
is translated as the period over which the membership fee is due (only for accept giros) |
|
$+n$ and $‑n$ |
are translated as the date upon which the information is printed + n days or – n days |
If printing takes place on 29 February, “$+1$” is printed as “1 March” and “$-2$” as “27 February”.
If you want the date to be printed as 'today's date', enter $-0$ OR $+0$.
Four special ‘$' variables are available for this option when defining the layout:
|
$DEPOSITCODE$ |
will print the code of the deposit |
|
$DEPOSITWORDING$ |
prints the (language-)wording of the deposit |
|
$DEPOSITUSERID$ |
prints the borrower id of the person using the deposit |
|
$DEPOSITUSERNAME$ |
prints the name of the person using the deposit |
When you have selected the text level, an input screen will be displayed. Enter the text in this field.
Note
With ‘Direct debit', the text has a slightly different function. The text should consist of a number of codes, followed by a “= “ (equals sign) and the value of the code. This information is then used to generate a file with payment orders for direct debit to be sent to the BGC (Bank Giro Center).
The following texts must be included in the text. The codes and their meaning are given here. For the exact values, please see the brochure published by the BGC titled ‘ClieOp02”, which can be requested from the Bank Giro Center.
|
Codes |
Meaning |
Examples: |
|
INZEND |
sender identification |
OBG |
|
DUPL |
Duplicate code |
1 |
|
GROEP |
Transaction group |
10 |
|
RKBG |
account number principal |
567885 |
|
VAST |
fixed description |
Membership fee through $CON |
|
NAW |
Name and address code |
1 |
|
VWDAT |
desired processing date |
$+28$ |
|
NAME |
name of principal |
O.B. Geldrop |
|
TEST |
test code |
P |
|
SOORT |
Transaction type |
1002 |
|
OMSCH |
Description |
$BIB$ |
If you would rather use SSP formats for some types of print functions, this has the following consequences:
· The print function is sorted according to borrower category, and then according to name;
· The print function can differ from one borrower category to another;
· The layout and content of the print function can be defined using the principles of the SSP print module, by which the entire range of functions can be applied.
When you select this menu option, an overview screen will be displayed with print function types and borrower categories. By displaying “OK”, the system indicates which print profiles have been defined.

On this screen you see what layouts have been defined for each borrower category in the system.
Explanation of the layout types:
|
Abbreviation |
Print function type |
Code |
|
CI1 |
Overdue 1 |
RAP1 |
|
CI2 |
Overdue 2 |
RAP2 |
|
CI3 |
Overdue 3 |
RAP3 |
|
CI4 |
Overdue 4 |
RAP4 |
|
CI8 |
Overdue concerning borrower import program |
RAP101 |
|
CI9 |
Second for overdue concerning borrower import program |
RAP102 |
|
Rsv |
Reservation messages |
RESV |
|
Rec |
Automatic reclaims |
TRUG |
|
Rcm |
manual reclaims |
TRUA |
|
I11 |
debt invoice |
RK11 |
|
I12 |
overdue debt invoice |
RK12 |
|
I21 |
invoice items not returned |
RK21 |
|
I22 |
overdue items not returned |
RK22 |
|
I31 |
free invoices |
RK31 |
|
I32 |
overdue free invoices |
RK32 |
|
I41 |
invoice loan fee |
RK41 |
|
I42 |
overdue invoice loan fee |
RK42 |
|
I51 |
[currently not in use] |
RK51 |
|
I52 |
[currently not in use] |
RK52 |
handling of notices over multiple pages. Selecting this option will result in the following form
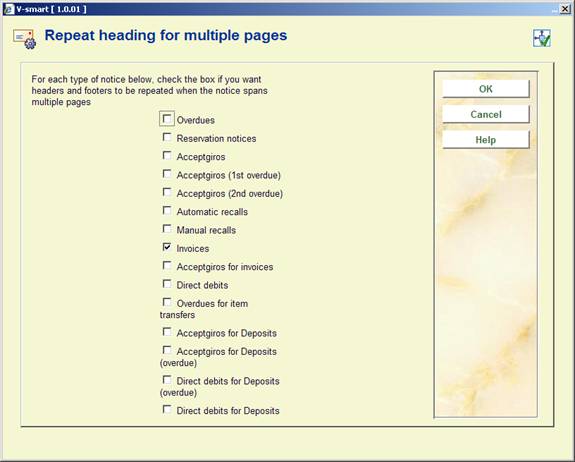
If the output for a given notice type extends across multiple pages of output, then the following option allows you to specify whether the headers and footers should be repeated on the continuation pages. This is particularly relevant if notices are sent using automated enveloping machines.
The above screen shows the setting defined for the current logged in location i.e. the setting is defined on a per location basis. However, in general, the setting is likely to be the same for all locations. so when the settings are saved (by clicking OK), then another form is popped up, allowing you to populate all locations with these settings.
: After choosing this option the following form will be displayed:

Enter the details for copying one profile to another of for creation of a new profile based on the definition of an existing profile.
If you enter to borrower category as *, it will copy to all borrower categories.
: Here you can modify an existing profile or create a new profile. This is explained in the next section. After choosing this option the following form will be displayed:

Note
Notice texts can be defined in a number of different languages. For language specific notice tests (blocks of texts before / after printout plus the Lines before and after) the system uses the following logic to determine which text to apply to the notice.
· Check the borrower record for a language code like the system codes dut, fre or eng. You can define other language codes in AFO 482 – Borrower file parameters – Borrower Authority lists, as long as they are 3-letter codes.
· If a language code does exist in the borrower record, then this is considered the language of the borrower. If the code is not specified, OR if the language code is not one that matches the definition in the Borrower Authority lists, then the system will use the default language of the system (which is set on installation).
· Dates, borrower salutation titles and the site defined texts for the notice contents / email will use this language specified (borrower specific or default).
· The texts / output first uses the texts defined for the language of the borrower. If there is no text defined for the borrowers language, then use the texts for ‘Default” where available else use the texts for the language of the system
When you do this for a new profile the following input screens will be offered sequentially:
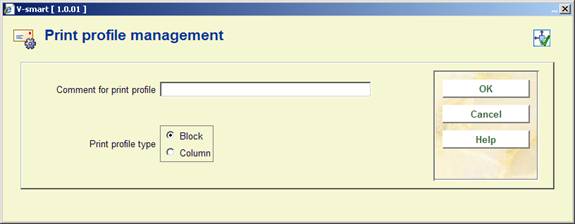
Print profile type: choose “Blocks” to have the data printed in blocks for each title (title etc. information will be displayed in blocks containing a line for each element defined) or “Columns”(title etc. information will be displayed in columns containing the various data elements for all overdues, pickups etc.).

This input form deals with the various setting for the page layout. The options for Place of pagination are: C (center), L (left), or R (right); they have no effect if the previous option (Page numbers) is set to ‘N'.
End of email sign: The character defined here will be inserted at the end of each notice. In our example “_” will be inserted at the end of each notice.

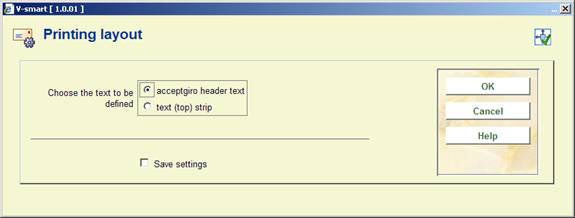
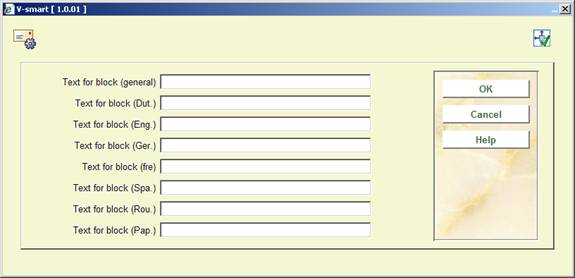
This input form allows you to define text for top and bottom of the forms in various languages. After choosing a language and clicking the form is presented:

Enter texts as appropriate and repeat this for as many languages as necessary. When you have finished this section click to proceed to the next form:
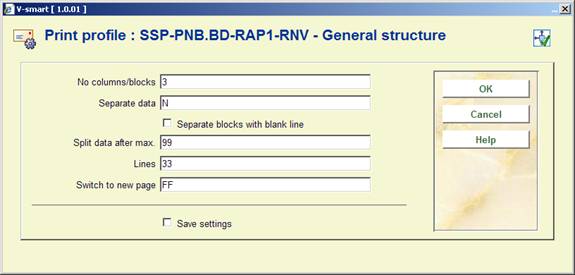
This form deals with the general characteristics of the (overdue, pick-up etc.) notice.
The No columns/blocks option allows you to define the number of columns or blocks (depending on the choice you made on the first screen) containing data such as title, item number, due date etc. you want to print on the (overdue, pick-up etc.) notice.
Next you are prompted with this input form:

Choose the appropriate data element from the dropdown list and click .
The next input form allows you to define labels (Blocks) or headers (Columns) for the chosen data element in several languages:
After which you are prompted for more parameters regarding the positioning etc. of this data element:
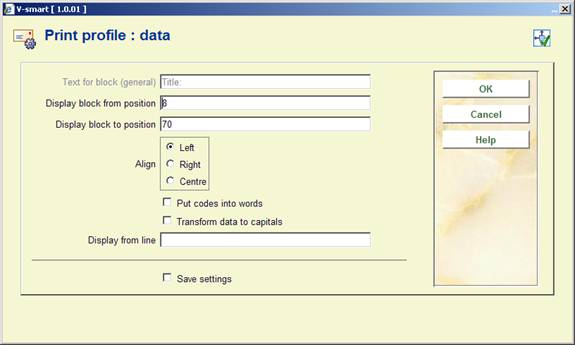
The system will repeat this prompt for the number of blocks/columns you specified in the earlier screen.
When you have finished the system will display a screen similar to the example below. You must now complete the layout by amending the following sections.
Free text: when you select this a new menu is displayed:

Choose Text before print-out to define the text that will appear at the beginning of a letter. Again you can do this for several languages:
After choosing a language you are presented with an editor window:

Enter texts as appropriate and repeat this for as many languages as necessary. When you have finished this section click to return to the menu. Then repeat this for Text after print-out to define the text that will appear at the bottom of a letter.
Valid codes to be used here are:
· $$DATUM The date the notice was generated
· $$ADMINISTRAT The administration costs (only valid for invoices).
· $$BIBADRES The address of the library. This only applies to a pickup location in a reservations notice and only when 'Printing by location' is ON. You cannot use it to define a library location within an overdue notice - ***** comes out instead.
· $$ADLOC The address of the location (as defined in AFO 617)
· $$BTW The VAT amount (only valid for invoices).
· $$CONTACT The contact person as entered in the borrower record.
·
$$EMAIL The email addrss of the borrower. If borrower does not have an email address, the whole line is suppressed.
If the text is : Please use our Self-services to update your contact information. We currently have your email address recorded as $$EMAIL
then the output will be :
Borrower has email address: Please use our Self-servcies to update your contact information. We currently have your email address recorded as deb@geac.com
Borrower has NO email address: Please use our Self-services site to update your contact information.
· $$LEE=nr1,nr2, …. (Only valid for acceptgiros) everyone whose age is no.1, no.2 (or higher) who is sent an acceptgiro, the indication “(N)” is added after the first line of the text that is printed at the top right of the acceptgiro
· $$LENAD The name of the borrower, street and number, postcode and city as included in the first address of the borrower record. The Address to be printed on the notice uses the AFO 482 Address Priority Setup to determine the value of $$LENAD as a variable for the SSP notices. The AFO482 Print setup and SSP print setup for the address groups is also referenced when creating the SSP output for address blocks.
· $$LENAT The form of address (‘Mr'/‘Mrs') based on the field ‘gender' in the borrower record.
· $$LENNR The current borrower barcode number.
· $$LENTA The name of the borrower, street and number, postcode and city as included in the second address of the borrower record.
· $$LENWA The name of the borrower, department, street and number, postcode and city as included in the work address in the borrower record. This will always print the 3rd address (work or Business).
· $$LENZO The name of the borrower.
· $$REKENING The invoice number (only valid for invoices).
· $$TOTAAL The total amount as included in an invoice of the circulation module (only valid for invoices)
· $$START This can be used to specify the line number on which something should appear. This needs some care. If, for example, you set it to start at line 22 and there are more than 22 lines already on the notice before the place where $$LENNR (the borrower's barcode for example) should be printed, then the $$START command will be ignored.
Please note
Variables must always be the last thing on the line which will be printed If you add text after a variable it will just not appear on the printout.
Dates and the format in which they are displayed / printed comes from the Control Panel / Regional Settings / Date format on the workstation running the client.
When $$DATUM Is used as a variable, the long date format of the workstation printing the notices will be used.
When other dates are printed (i.e. Loan date or Due date) they are printed in the short date format.
If the requested address is not defined in the borrower record, the data from the FIRST address block found in the borrower record will be used, the system starts at address block 1 (home) down until it finds an address to be used.
In the case of guarantors, the address is the Main / Home address or the first address group found in the record.
There is an option to force the start of a certain line always at the same place (similar to $$START). Insert a line that starts with ### followed by a number xx (for example ###20). The next line will be forced to always start on the line xx.

When you select an already defined type of printout from the overview screen, the system will display a screen as shown in the example below immediately:

: The standard form for generating output will be presented. You can print the complete definition of the defined layout.
Note:
This will not print a sample letter based on the layout, just a listing of all the definitions that have been made, except the free text definitions.
: To add a free text explanation to this layout definition.
: To the delete the whole definition of this layout. You cannot delete lines from the ‘Blocks' (or ‘Columns') definition.
: Select two lines from the ‘Blocks' (or ‘Columns') definition (by using mouse and the CTRL-key) to swap their positions. This can be useful when you have made a mistake, because you cannot delete lines from the ‘Blocks' (or ‘Columns') definition.
Note:
Line 4 (General structure) determines the number of lines (‘Blocks') or (‘Columns') that will actually be printed. So more ‘Blocks' (or ‘Columns') can be defined than are set in this parameter. Make sure you amend this setting when you wish not to print all ‘Blocks' (or ‘Columns'). Again this can come in useful when you have made a mistake: use the option first to move a no longer required data element to the last position. Then decrease the number specified in General structure.
See the previous section for information on the various fields how to edit them.
Texts for various slips can be defined in the system. For the time being, this option is only used to print a freely definable text at the bottom of loan slips and the like.
When you select this menu option, an input screen will appear in which the language of the text can be defined. Next an input screen will appear in which the desired text can be entered.
Please note!
The width of these slips as well as other related parameters can be set in AFO 481 - Miscellaneous - Circulation Workflow – Printing. See the Help on this AFO for more information.
For the circulation print functions that do not use SSP, you can determine the address in the borrower administration to which the printed matter is to be sent. The system offers the possibility of defining the address to be printed per borrower category combined with the type of print function.
When you select this menu option, an input screen will be displayed:

For each borrower category, enter a parameter with ten digits in this field. Each of these digits pertains to a type of print function, in the sequence indicated below:
|
1 |
overdues |
|
2 |
Reservations |
|
3 |
Accept giros |
|
4 |
first overdue accept giros |
|
5 |
second overdue accept giros |
|
6 |
automatic recalls |
|
7 |
manual recalls |
|
8 |
accept giro with invoice |
|
9 |
direct debit |
|
10 |
Invoice |
Each digit can be given one of the following values:
|
1 |
send the printed matter to the first address |
|
2 |
send the printed matter to the second address |
|
3 |
send the printed matter to the work address |
Please note!
If no values are entered in this table, all notices will be sent to the first address.
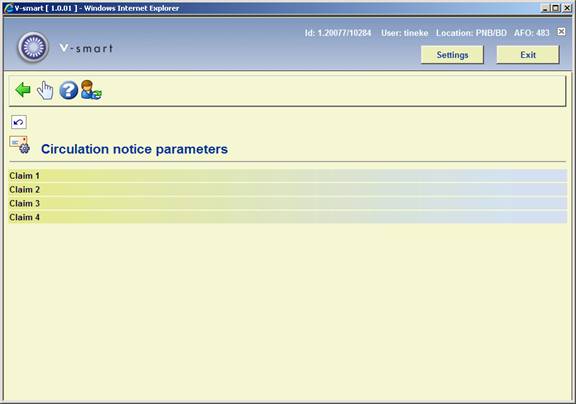
When this menu option is selected, a submenu will be displayed with the types of reminders have been defined:
Select a reminder and then this option to define the print profile for the collection.
Next an overview screen will be displayed with the selected print profile.
The print profile can be modified in this screen. The working method and options are explained in the section on SSP formats.
With this option you can define Subject and Contents of notices sent via email.
When this menu option is selected, a submenu will be displayed with the various notice types:
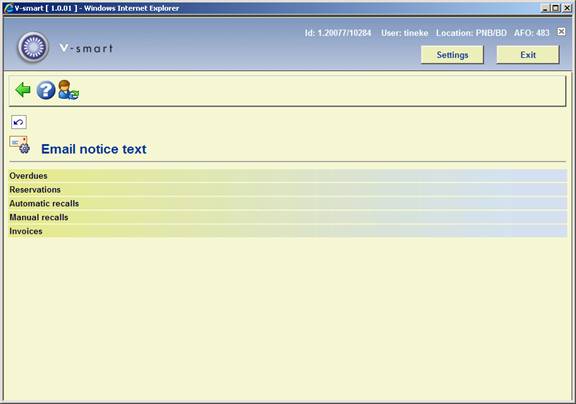
For each of these options you can define the following:

Indicate in this field the level on which the texts are to be defined. The system distinguishes between three levels:
· general: the texts apply to the entire system; in other words: for all locations of all institutions
· per institution: the texts apply to all locations of the institution for which your workstation is logged in
·
per institution/location: the texts apply only to the institution/location for which your workstation is logged in.
Please note!
Texts can be defined on multiple levels. When printing the texts, the system will select the most specific text available.
Choose an option, after which an input form is displayed:

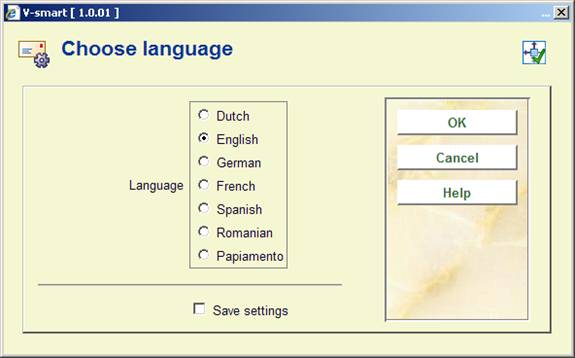
Choose an overdue number, after which a choice of language is offered:
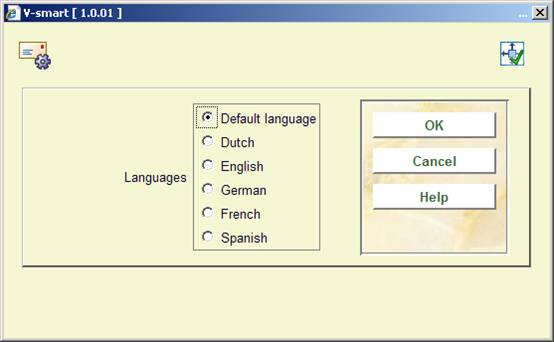
Choose a language, after which an input form is displayed:

Subject: This text appears in the Subject field of the email.
Message: This text appears at the beginning of the email body followed by the information as defined by your output . Enter the character '|' to indicate new line / line break within the message body.
Repeat subject in message: When the checkbox is on, the text from the subject field will be also included as the first line in the email body.
The method for the other options is identical.
You can use the same $$ codes as described in section 483.5.1, except for $$EMAIL.
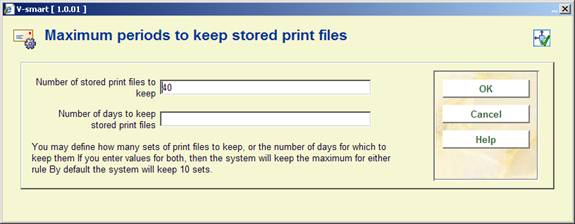
This option allows you to specify the number of days print files must be stored OR how many files you wish to retain. This enables you to reprint files if necessary. After choosing this menu option an input form will be displayed:
This section deals with the mail merging parameters. See the general help on this subject for background information.
After selecting this option a sub menu will be presented:

The options are described in the next paragraphs.
This option gives access to the available notice types that support mailmerge. After selecting this option an overview screen will be displayed:

Select a line to view/modify the associated parameters:

Please note
The fifth option (Fixed item line count) is available for all notice types except Expiring membership. All other options are the same for each type.
Notice location
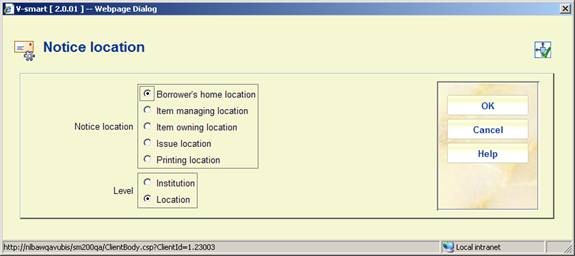
Essentially the idea is to define to which location the notice belongs.
Additionally, this may be set at the location OR the institution level. It is this that determines the contents of the main “library address” field offered as a printing field.
Notice location has 3 possible implications
· To define the “library address” available
· To allow a filter on printing
· To act as a “key” for the “Start new file” option – i.e. to physically separate out the notices.
Sort order

On the left there is a list of fields that can be part of a notice and also that make sense to be part of a sorting criteria. The fields required for sorting can be pushed to the right and the sort order determined by moving them up and down.
Typical settings might be to sort the notices by
· Notice Institution
· Notice Location
· Borrower category
· Borrower name
· Borrower Id
which would have the effect of aggregating notices for a given branch, then grouping within that by borrower category.
Start new notice on
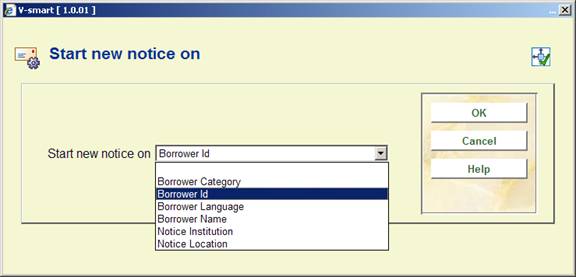
This setting determines which field forces the system to start a new notice i.e. a new set of pieces of paper. This would have to be selected from one of the fields chosen in the sort order.
Start new file on
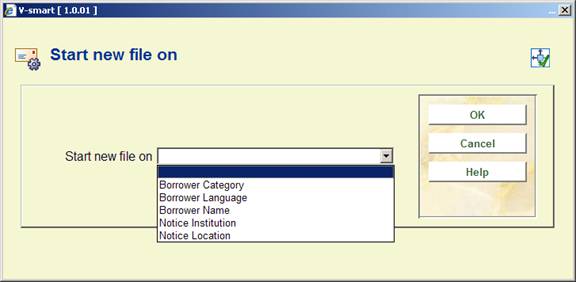
Optionally the system can be told to create a new file, on change of this setting. This would only be used when “save to file” is used. Suppose this were set to “Notice Location” then the system would save the notices for each branch to different files.
Fixed item line count
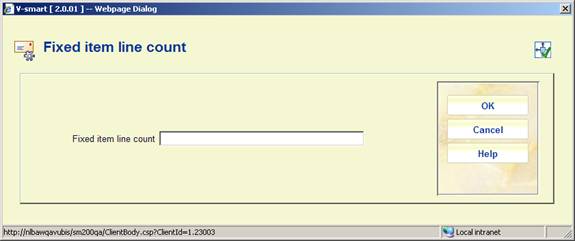
If it can be guaranteed that the notice is configured to output (say) 5 item detail lines, then the “Fixed item line count” can be set to 5. This dramatically improves the performance of the mailmerge operation (unless individual notices are being saved).
The idea here is that we define “sets of notices” independently of anything else (in the way that, for example, System Calendars exist in isolation, but are then linked to from various functions i.e. they can be shared).
A notice set simply defines the names of the master documents which relate to each type of notice, supported by the system. Notice sets are defined per circulation metainstitution.
After selecting this option,an summary screen will be displayed:
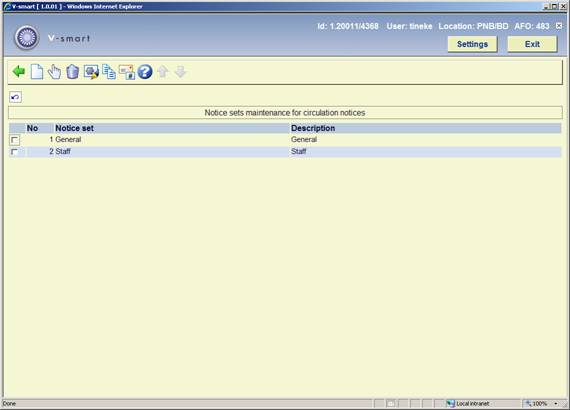
: Use this option to add a notice set. See section 483.11.2.1 for details.
: Select a line and then this option to define the notice set. See section 483.11.2.2 for details.
: Select a line and then this option to delete the notice set. The system will prompt for confirmation.
: Select a line and then this option to view/modify the general details of the notice set. See section 483.11.2.1 for details.
: Select a line and then this option to create a new notice set based on the parameters of the selected notice set.
: Use this option to determine the notice types to be used and their wording. See section 483.11.2.3 for details.
After selecting the option or an input form will be displayed:

Next you must use the option to set the parameters for the notice set.
: Select a line and then this option to define the notice set. An overview screen will be displayed, listing each type of notice defined for that specific notice set:

The notice types are defined by the system – the library can't simply add a notice type to this and expect it to work.
Selection of a line brings up an input form allowing the user to define the full pathname of the main document. In the above examples, these are all defined on a (presumably) shared M: disk drive.

This is used to to define the full path and document name of the Main document. It is possible but not necessary to define a separate main document for the Email notice. Also the Email subject can be defined here. The “paper size” field is used by the inter library loan module and not relevant here.
Save OutputSets allows each notice to always be saved as a particular file. The storage place is defined in the ini file for the print processor that will output the notice.
: This allows a separate main document/template to be defined for different contact languages. This is optional – but it allows for the fixed texts of a notice (or indeed the whole notice layout) to be changed according to the contact language of the user for whom the notice is destined.
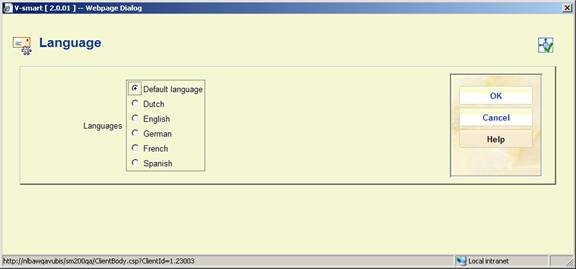
After selecting this option an input form will be displayed:

After selecting a language, a screen similar to the main screen will be displayed (see above for an explanation). The current language will be displayed in the header of the screen:
![]()
: Use this option to determine the notice types to be used and their wording. An overview screen will be displayed:

Selecting a line results in an input form where the wording can be defined:

Selecting the option will take you to a form where the notice types to be used can be selected and ordered:

This allows the library to define which notice set is to be applied to each borrower category, for the current notice printing location. After selecting this menu option, an input form will be displayed:

Select the relevant notice set from the dropdown list for each borrower category.
Here you can set a method of "No output". This means that the output will be ignored for regular 452 runs by default. However this group is made available in the Stored print files so that they may be optionally sent out as printouts if required (this gives a list of those borrowers who did not get notices) and thus allows for a means of tracking / updating borrower records later.
After choosing this option a selection form will be displayed:

Here you can select the different types of notices to be suppressed for specific borrower categories.
Please note
A "no-output" method as defined in AFO 616 can be used instead of Print as a catch-all method for the generation of the notices which have failed any other contact types for the method. This will override the standard default of if all else fails use PRINT.
For example: If you have a method defined as email only and the borrower has no email address then the default is PRINT (when nothing else is defined), so the notice will end up in the Printed set. If the method is defined as email & no output and the borrower has no email address then the notice will end up in the No output set.
So that one is different form this setting, which means "no output at all".
The Vubis server supports two types of SMS messages – those sent through Voicemail (Itiva) and those sent to a specified SMS server (http). When sending through Voicemail, the messages supported are restricted to Overdue and Reservation notices. When sending to an SMS server, the supported messages will include: Overdue notices, Reservation notices, Courtesy notices, Recall notices and PIN code change notification.
Reservation confirmation (WebOpac) and General notices to the list of borrowers in a savelist from SSP are supported by sending messages to an SMS server only.
This option allows library to enter actual message text for each type of notice.
After choosing this option a language selection screen will be displayed:
Select the required language and click , an input form will be displayed:

Each field is a multi line text box that allows you to enter text. There are 5 special fields that can be placed within the text: <B> borrower name, <T> title, <L> location, <N> number of overdue items, <D> due date. Each of these special fields is followed by the maximum number of characters to display enclosed in square brackets. For example, <B>[10] will display a maximum of 10 characters from the borrower's name. <D> due date is applicable only to courtesy notices.
An SMS message is limited to a length of 160 characters. Vubis server functions will not attempt to send any text message > 160 characters.
The system will check each field to ensure that the length of the defined text will not exceed the 160 character length limit for an SMS message.
Examples
Reservation: Dear <B>[10]: “<T>[40]” is available for pickup at the <L>[20]. This definition results in a text message containing the following:
Dear Simon White: “Harry Potter and the chamber of secrets” is available for pickup at the Central branch.
Courtesy notice: Dear <B>10: “<T>[35] is due on <D>15. Please return it to the library by this date.
Overdue 1: Dear <B>[10]: You have <N>[2] overdue items. Please consult the website for details.
Manual recall: Dear <B>[10]: Please return “<T>[35]” to the <L>[30]
When <B> is used, the borrower name's contents comes from the definition in AFO 482 – Borrower name setup.
When <L> is used, the system inserts the contents of the location name as defined in SMS location names (see below).
This option allows library to create an entry for each location in the Circ metainstitution containing a SHORT location name that can be sent in the text message.
After selecting this option an overview screen will be displayed:

: Use this option to define a new short name. An input form will be displayed:

Select a Location code from the dropdown list and enter the required Short location name to be used in SMS messages.
: Select a line and then this option to modify the existing short name. The same input form as the one above will be displayed. Only in this case you cannot modify the Location code.

: Select a line and then this option to delete the definition. The system will prompt for confirmation.
· Document control - Change History
|
Version |
Date |
Change description |
Author |
|
1.0 |
June 2008 |
creation |
|
|
2.0 |
August 2008 |
various updates; new options for mail merge |
|
|
2.1 |
January 2009 |
options for automatic notice production |
Tineke vanBuul |
|
3.0 |
October 2009 |
general textual improvements; new options: notice production suppression email notice texts by location, SMS messages |
Tineke vanBuul |
|
4.0 |
April 2010 |
new variable $$EMAIL |
Tineke vanBuul |
|
4.1 |
March 2011 |
Allow for Automatic notice production for courtesy notices |
|